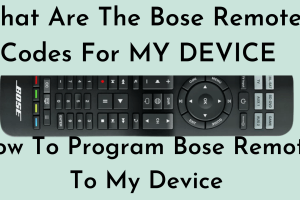
Have you heard lately that the Pilot tv remote is designed with features that can control other devices? Yes, that’s right! The Pilot remote control is designed to work with other devices using a corresponding code. It only requires that the code is Manufacturer supported and compatible with the model and brand of your device.
Pilot Universal Remote Codes List
We have the complete list of Pilot universal remote codes, of which you can select the right one to match the brand and model of your device. All the codes in the list have corresponding model numbers and device brands. Also, you can see the RCA remote codes for the ONN TV, which may help you.
The Pilot remote has 3-digit, 4-digit, and 5-digit codes based on the device model and version. Select the correct code based on your device model and version.
How to Program Pilot Universal Remote
If you desire to organize all your devices to be controlled by a single remote, programming the Pilot universal remote is the answer. The procedure in programming requires a few minutes, while the process itself is straightforward. One big key in this process is to secure the correct code compatible with the device. Using an invalid code during the program may accept the code, but that leads to an incomplete setup.
You will need to follow step-by-step instructions to program the Pilot universal remote.
How To Program Pilot Universal Remote Control With Codes
Like other universal remotes, the Pilot remote also allows users to program it with the code.
- Note down the code before starting the remote setup.
- Install batteries into the remote and press the “DEVICE SELECT” key on the remote to select TV1, TV2, AUX, or DVD.
- After this, press the “CODE” key on the remote.
- Now this time, enter the code that you selected for your device. If the remote recognises the code, the LED indicator will flash four times. Otherwise, the LED indicator will go off. Now you have to press the “CODE” key on the remote to enter a new code on the remote.
- Finally, check the remote functions as you expected. If the device is responding to the device, the remote has been found correct, and the setup is completed.
- If the device doesn’t respond to the device, you will need to reprogram your remote again from step 2.
How To Program Pilot Universal Remote With Auto Code Search Method
The codes in the remote memory will be sent to the device. During this process, the remote will select the correct code for the device. Follow the steps below to program your Pilot remote with the auto-code search method.
- Turn on the device you want to program with the Pilot universal remote.
- Select your device (TV1, TV2, or AUDX) by pressing the “SELECT DEVIE” key on the remote.
- After this, hold down the “CODE” key on the remote.
- Face the remote at the device and press and hold down the “ON/OFF” key until the device turns off. The LED indicator will flash several times while sending codes to the device.
- Release the “ON/OFF” key immediately when the device turns off.
- After this, the LED light will blink four times to store the code in the remote database.
- Finally, turn on your device with the help of the remote and check the functions which you want to control your device. If the device responds to the device, the step is completed. If not, try to reprogram your remote from step 1.
Conclusion
Have you picked up the perfect Pilot universal remote code which worked with your device? We are glad that this article has helped you to set up the remote compatible with your device. We would like to hear about your experience that you can share with us by leaving a message in the comment box below.


Add Comment